A person smoothly installing laminate flooring planks with a curved edge.

Everything You’ll Need

ToolLuxury Vinyl Plank (LVP)Luxury Vinyl Tile (LVT)Sheet Vinyl
Utility Knife
Tape Measure
Straight Edge
Pry Bar
Spacers
Tapping Block
Non-Marring Hammer
Squeegee
Grout Float
Notched Trowel
Floor Roller
Heat Gun
Seam Roller

Step 1: Prepare the Space

Remove Baseboards and Old Flooring

Start by taking off baseboards and old flooring for vinyl plank installation. This makes the floor clear.

Use a pry bar to carefully remove the baseboards without harming walls.

If pulling up carpet, cut it into pieces with a utility knife and lift it. For other floors, follow the right methods to take them out.

Clean the Subfloor and Repair Cracks or Bumps

Sweep and vacuum the subfloor thoroughly to eliminate dirt. Look for cracks or uneven areas.

Use leveling compound to fill in gaps or low areas, and sand down high spots for a smooth finish.

Add Underlayment for More Cushion and Quiet

Underlayment is optional but can make the floor softer and quieter.

If using underlayment, roll it out on the subfloor, secure with tape, and make sure there are no gaps or overlaps.

Step 2: Pick a Pattern or Design

Vinyl flooring designs offer various choices to enhance your space.

From classic to modern, these designs let you create unique floors that fit your style.

Explore popular vinyl flooring designs and see how they can transform your home.
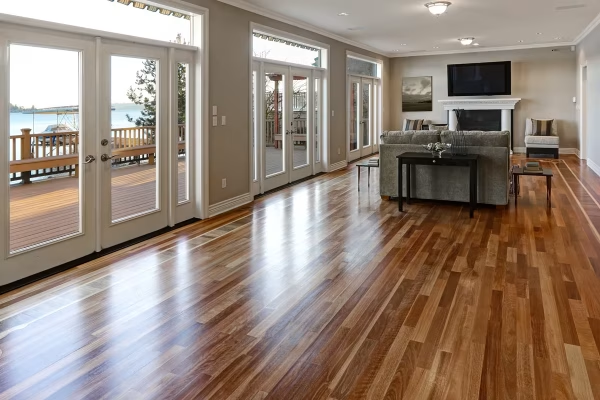
Straight Lay Design

Straight Lay Pattern

The straight lay design is the easiest way to install vinyl floors. The planks align with the walls, providing a neat, uniform look suitable for any room.

Diagonal Design

Diagonal Pattern

For a lively appearance, try the diagonal design. Planks are set at a 45-degree angle, adding depth and making rooms appear larger.

Herringbone Design

Herringbone Pattern

The herringbone design is a classic for vinyl floors. Planks are arranged in a zigzag pattern, adding elegance and texture to any room.

Chevron Design

Chevron Pattern

The chevron design offers a chic option for vinyl floors. Planks are laid in a continuous zigzag, giving a modern touch to any space.

Parquet Design

Parquet Pattern

Parquet designs arrange planks in geometric shapes such as squares or diamonds, adding sophistication and interest to formal areas.

Mixed Designs

Mixed pattern

Combining different vinyl designs can create a custom look. This allows for unique styles reflecting personal taste.

For example, mix a straight lay design with a herringbone border or use contrasting colors for a checkerboard effect.

Step 3: Choose an Installation Method

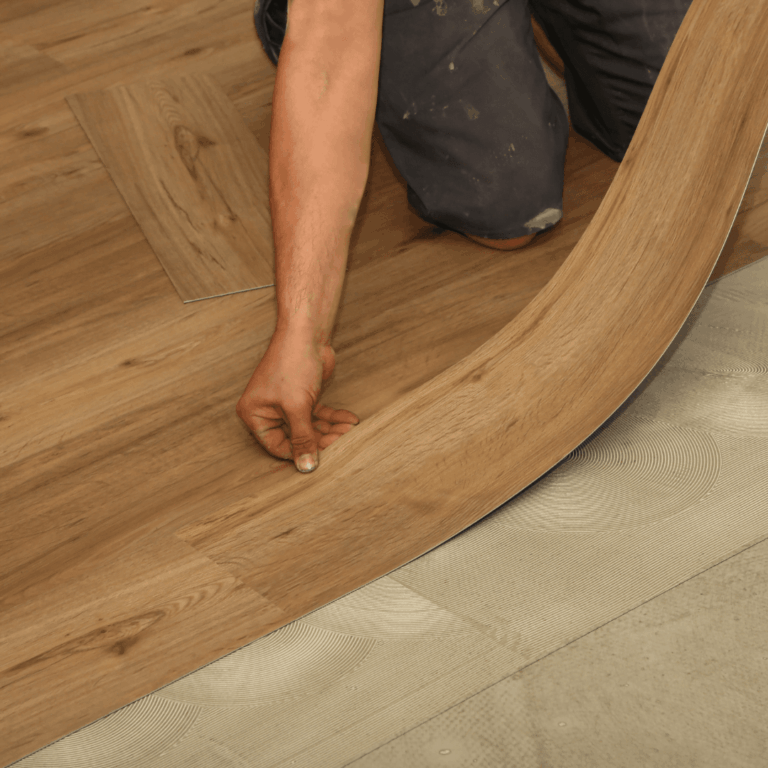
There are many ways to install vinyl plank flooring, each with its own benefits, based on the vinyl type and what you need.

GripStrip Method

GripStrip Method

GripStrip, or peel-and-stick, is an easy way to put down vinyl plank flooring.

It has a sticky backing that you peel off and stick to the floor.

This is best for Luxury Vinyl Plank (LVP) flooring, which is thicker and sturdier.

It may not be as good for thinner vinyl types.

Click-Lock Method

Click-Lock Method

Click-Lock uses planks with edges that snap together, making a tight fit.

No glue is needed, and the floor floats over the subfloor, adapting to temperature and humidity changes.

This is suitable for LVP and LVT flooring and some Sheet Vinyl.

Take Note:

  • Follow the manufacturer’s instructions for matching and connecting the planks to avoid gaps or uneven seams.
  • Use spacers along the walls to prevent the floor from buckling or warping.

Glue-Down Method

Glue-Down Method

Glue-down involves applying adhesive to the subfloor and pressing the planks into place.

This method provides a strong, long-lasting bond, good for busy areas or commercial spaces.

It’s stable and can handle heavy use and moisture.

Take Note:

  • Use high-quality adhesive designed for vinyl flooring.
  • Work in small sections to keep the adhesive sticky during installation.
  • Press the planks firmly with a roller for proper bonding.
  • Let the adhesive cure before heavy use.

Step 4: Lay the First Row

Trim the Short Tongue Edge of the First Plank

Start the first row by cutting off the short tongue edge of the first plank. This makes it fit against the wall. Use a utility knife to carefully cut along the tongue edge.

Lay the First Plank 1⁄4 Inch from the Wall

Put the first plank about 1⁄4 inch from the wall. This gap allows the floor to expand with changes in temperature and humidity. Use spacers to keep this gap the same.

Use Spacers for Expansion

Place spacers between the planks and the walls to maintain the 1/4-inch space for expansion. These spacers will help your flooring adjust properly.

Step 5: Cutting Planks to Fit

Use a Utility Knife to Score and Snap Planks

To fit planks around corners, mark them with a utility knife on the line. After marking, snap the plank along the line for a clean break.

For Irregular Cuts

Use a jigsaw or oscillating multi-tool for tricky cuts, like around door frames or pipes. These tools make accurate cuts and handle complex shapes. Learn how to use a jigsaw here.

Cutting Planks Around Pipes

Measure the pipe’s size and add an inch. Drill a hole in the plank matching this size. Cut the plank to fit around the pipe, leaving a half-inch gap for expansion. Install the plank and secure it with silicone caulk.

For Tight Spaces Like Under Door Jambs

Use a jamb saw to cut planks for tight spaces like under door jambs. A jamb saw makes precise cuts close to the floor, helping planks fit neatly.

Step 6: Laying Subsequent Rows

Join the Plank’s Edge with the Previous Row

For each new row, fit the edge of the plank into the previous row’s slot. This connects them and keeps the floor level.

Use a Tapping Block and Soft Hammer

To make sure the planks fit well, gently tap them with a tapping block and soft hammer. Do not use a regular hammer directly on the planks to prevent damage.

Step 7: Finishing the Installation

Install Transition Strips

After placing all the planks, put transition strips at doorways and between rooms. This makes changes smooth and keeps floor edges safe. Follow the maker’s instructions to install transition strips.

Transitioning to Other Flooring

When changing to another floor type, use a T-molding or reducer strip. Attach the transition strip to the subfloor for a tidy look.

Leave a 1/4-inch gap between the vinyl planks and the transition strip so the floor can move and won’t buckle.

Reinstall Baseboards

Attach the baseboards back to the wall, not the floor. This lets the floor expand and contract easily.

Allow the Floor to Acclimate for 48 Hours Before Use

Let the new floor sit for 48 hours before walking on it or adding furniture. This helps the floor get used to the room’s temperature and humidity.

Common Things to Avoid When Installing Vinyl Floors

Wet Areas

Vinyl plank floors are not suitable for wet places, like bathrooms. Water can enter seams, making planks bend or peel.

Using Tools on the Planks

Using a rubber mallet or hammer can harm the planks. Always use a tapping block to keep them safe during installation.

Do Not Overlap Plank Ends

Avoid overlapping plank ends in nearby rows. Overlapping can weaken the floor and cause unevenness.

Wait Before Walking

Do not walk on the floor for 48 hours. This time allows the floor to settle and stay strong.

Tips for a Successful Vinyl Flooring Installation

  • First, measure the room carefully to know the amount of flooring you need. Add 10% extra for cutting and waste.
  • Check each plank before you start. Throw away any that are damaged for a good finish.
  • Wear a knee pad for comfort during installation. It protects your knees and makes the job easier.
  • Go slowly and be careful to avoid mistakes. Rushing can lead to errors and make it look less nice.

Installation Costs for Vinyl Plank Flooring

The price for installing vinyl plank flooring depends on the method:

  • Peel-and-stick: Usually costs from $1.50 to $8 per square foot.
  • Glue-down: Ranges from $2.50 to $12.50 per square foot.
  • Floating/Interlocking: Costs about $3 to $13 per square foot.

Labor costs range from $1 to $3 per square foot, depending on difficulty.

Extra costs may include underlayment, $0.50 to $1.00 per square foot, and transition strips and trim, $1 to $5 per linear foot, for a finished look.

Do You Need Professional Help With Your Vinyl Flooring Installation Project?

Now that you know how to install vinyl plank flooring, you’re ready to make a beautiful floor. If you want experts to do it, we can help.

Our flooring installation team handles everything — from preparing the subfloor to placing the planks perfectly — so you can relax and enjoy great results. We’ll help you choose the best vinyl flooring for your space, like luxury vinyl plank or sheet vinyl.

Contact us today to book your free in-home consultation and see if we serve your area.